A living manifesto in ten objects.
#10 bed
CARTE BLANCHE
ANTONIO SCARPONI • 14.01.2019
Read the manifesto in our first article #1 armchair.
A quarter of a man’s life is on average spent unconsciousnessly while time goes by cyclical rhythm like a melody, following the alternation of day and night. Action and rest are separated in a way that musicians would call quadruple metre, where the fourth quarter – the one with the weakest beat – represents sleep and night. In my opinion, nothing but a bed better represents the ultimate essence of living. The place harbouring our body during the most fragile moments of our being. Sleep, love, illness and if lucky maybe also death. Not to forget, pregnancy in the broadest sense of the word, and birth. This is a bed that shall take care of you.
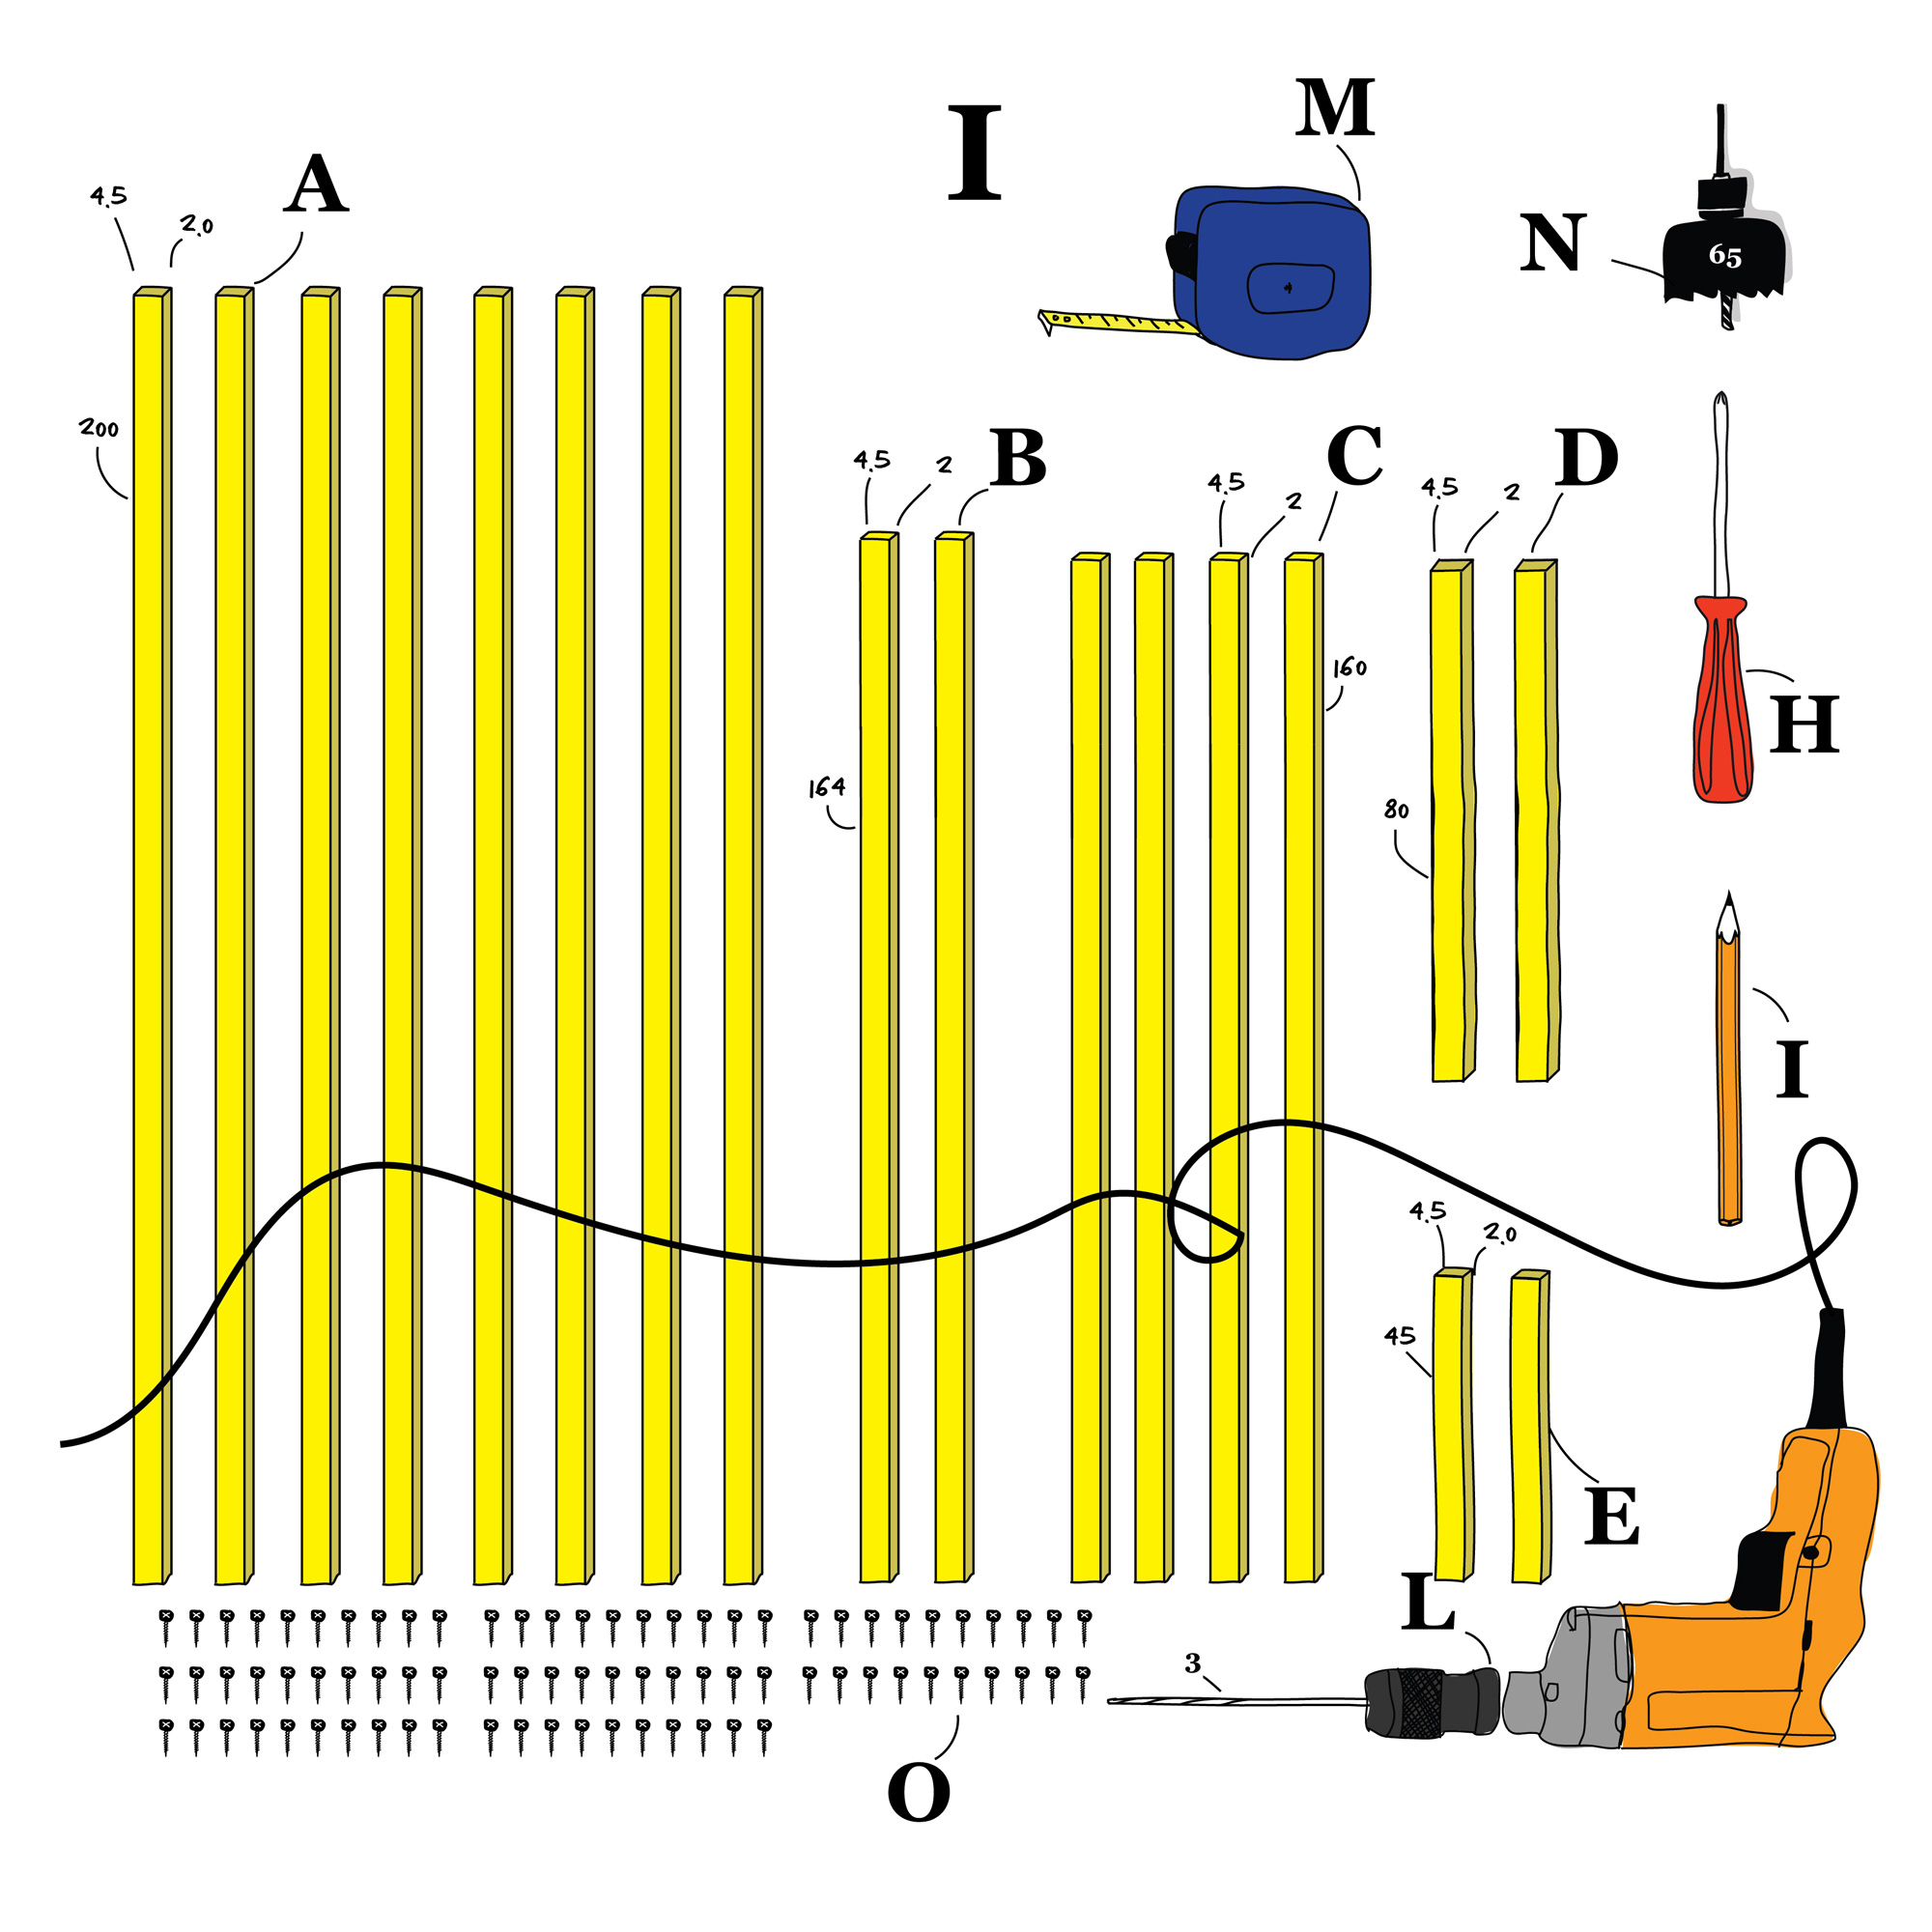
A, B, C, D, E. FSC certified fir strips, planed and variably sized. The profiles are available in length of 1 m or 2,5 m and can be bought in any DIY store (e.g., Coopbau, Jumbo, Migros DoIt, Bauhaus etc.). With this scheme you can get the pieces cut on site by the customer service offered by a.m. retailers. Try to select the profiles with fewer knots and as straight as possible.
H. Screwdriver; we recommend to use an electric screwdriver.
I. Pencil.
L. Electric drill / screwdriver, with 3mm wood drill bit.
M. Extensible measuring tape.
N. Hole drill, ø80 mm.
O. Drywall screws 3.5×35 mm, black (important).
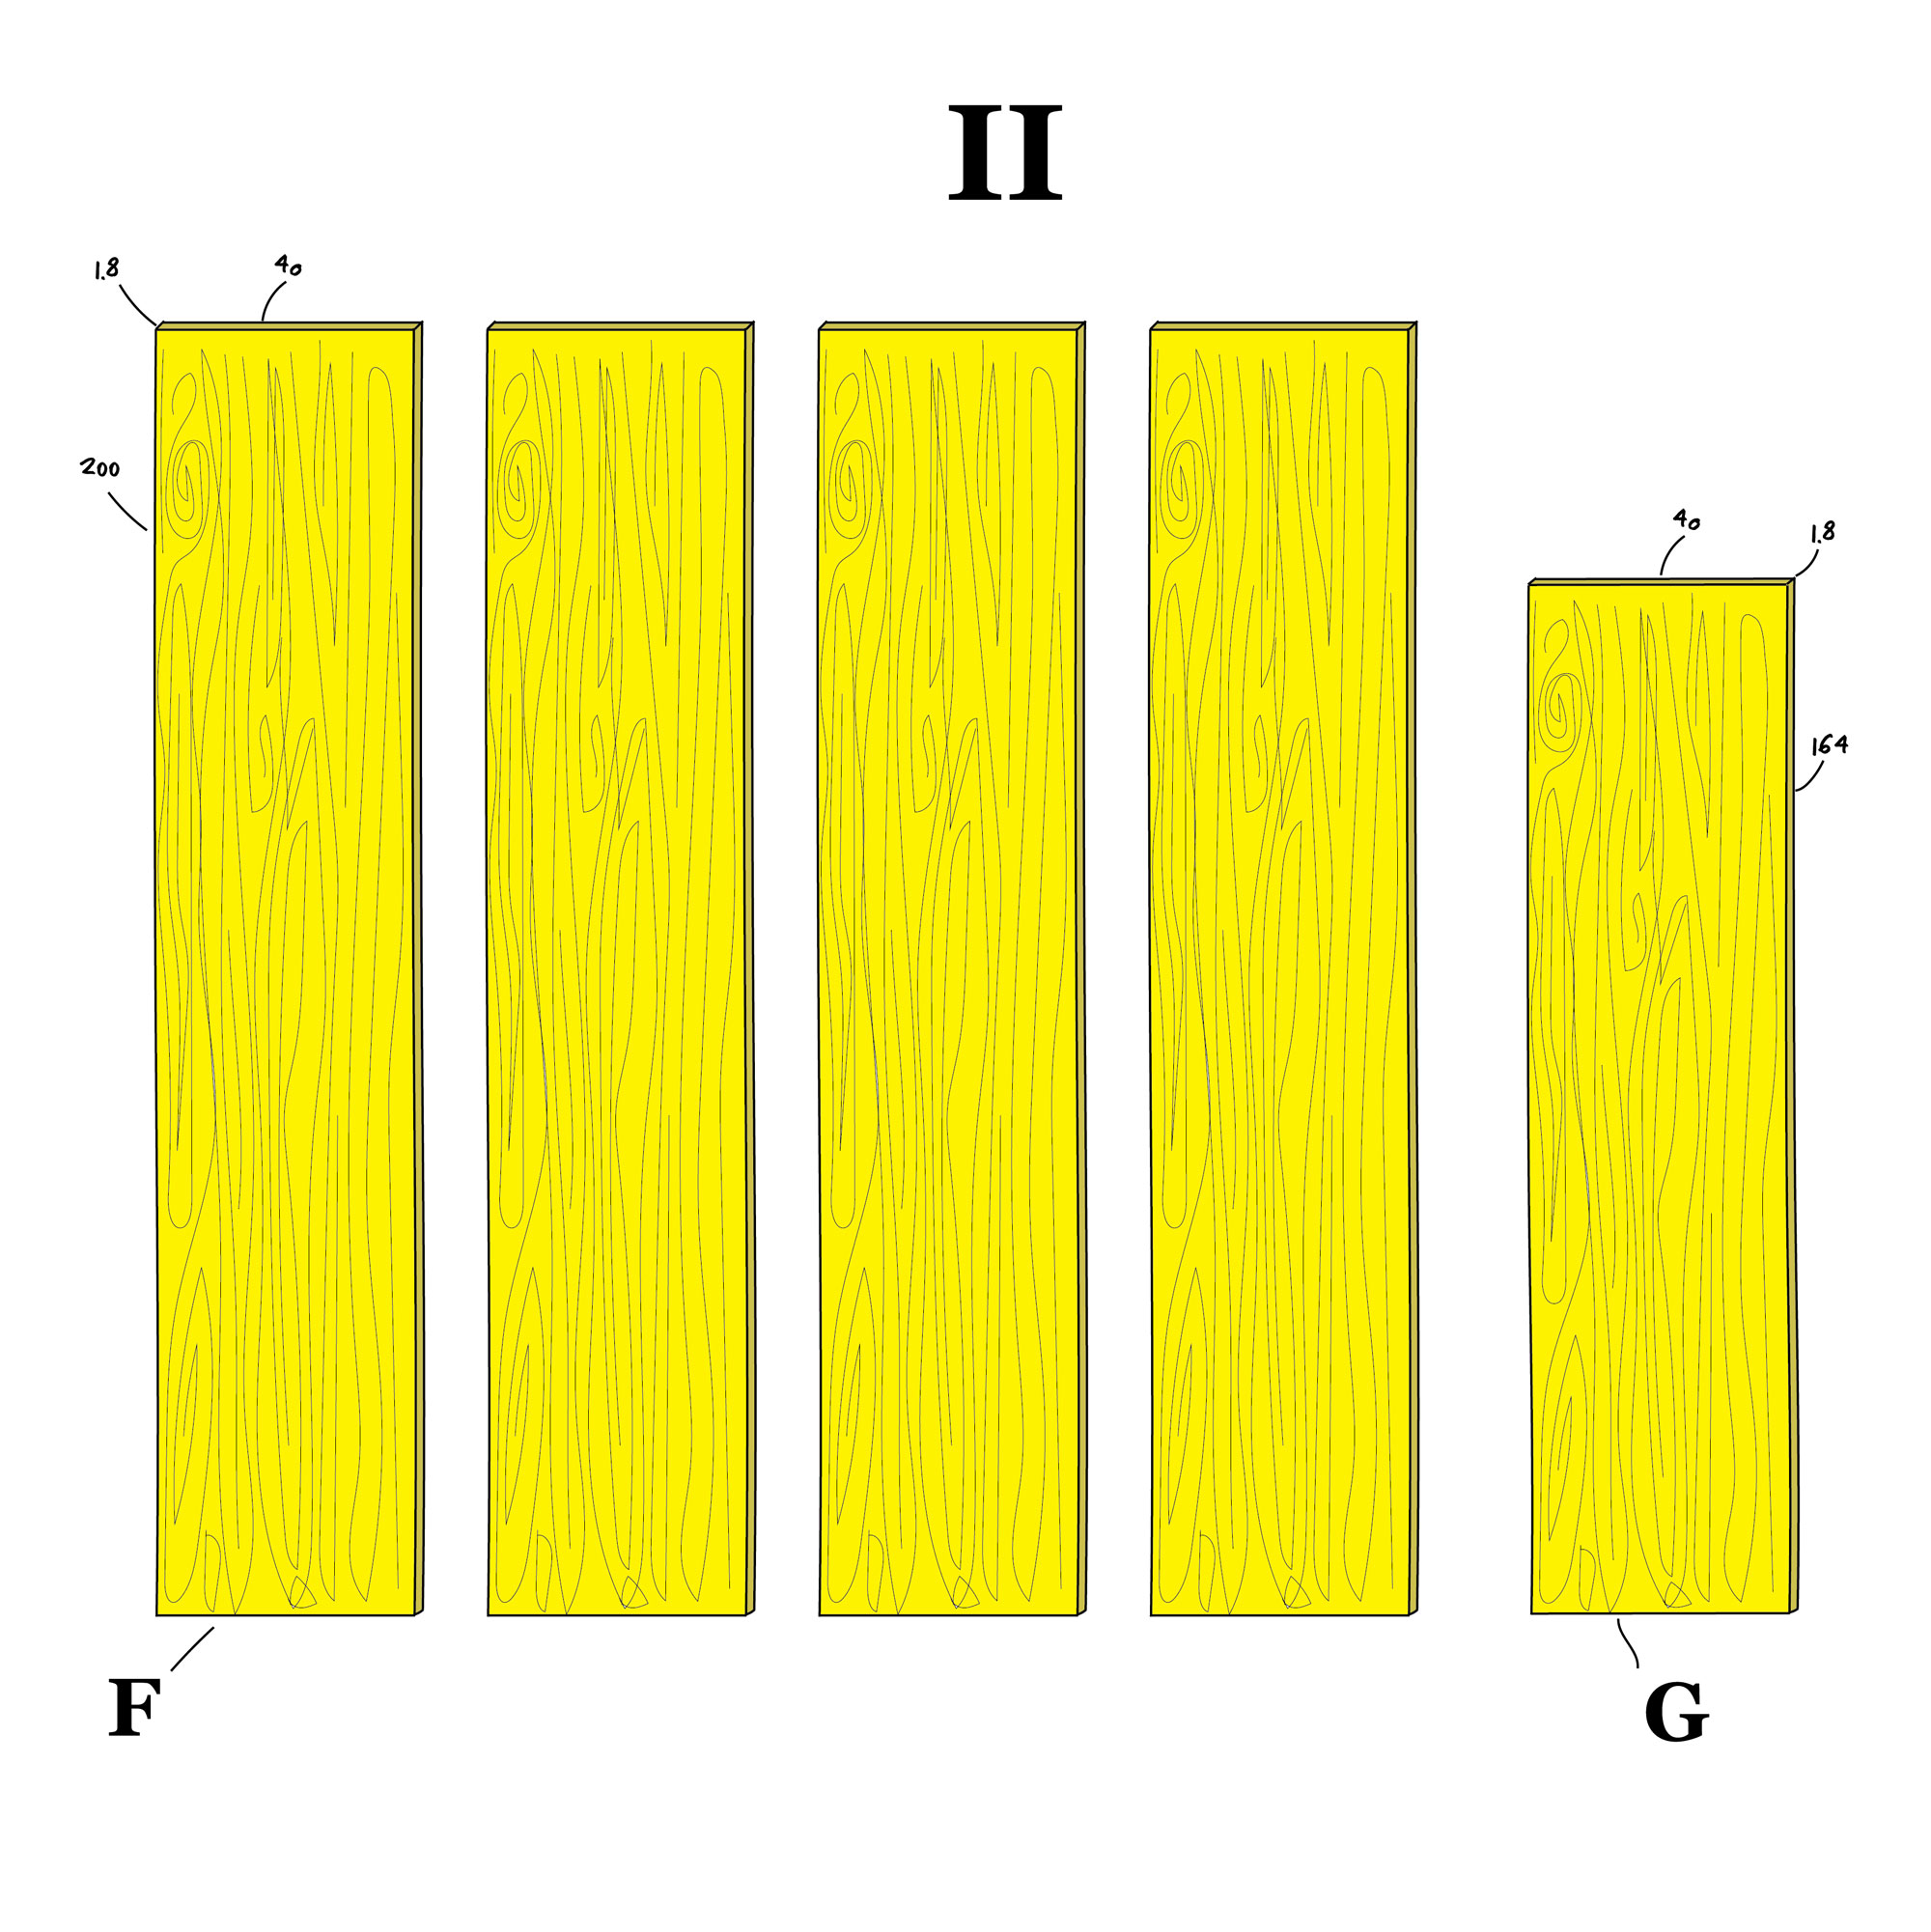
F, G. FSC certified fir strips, class B. Size: 1.8 x 40 x variable length.
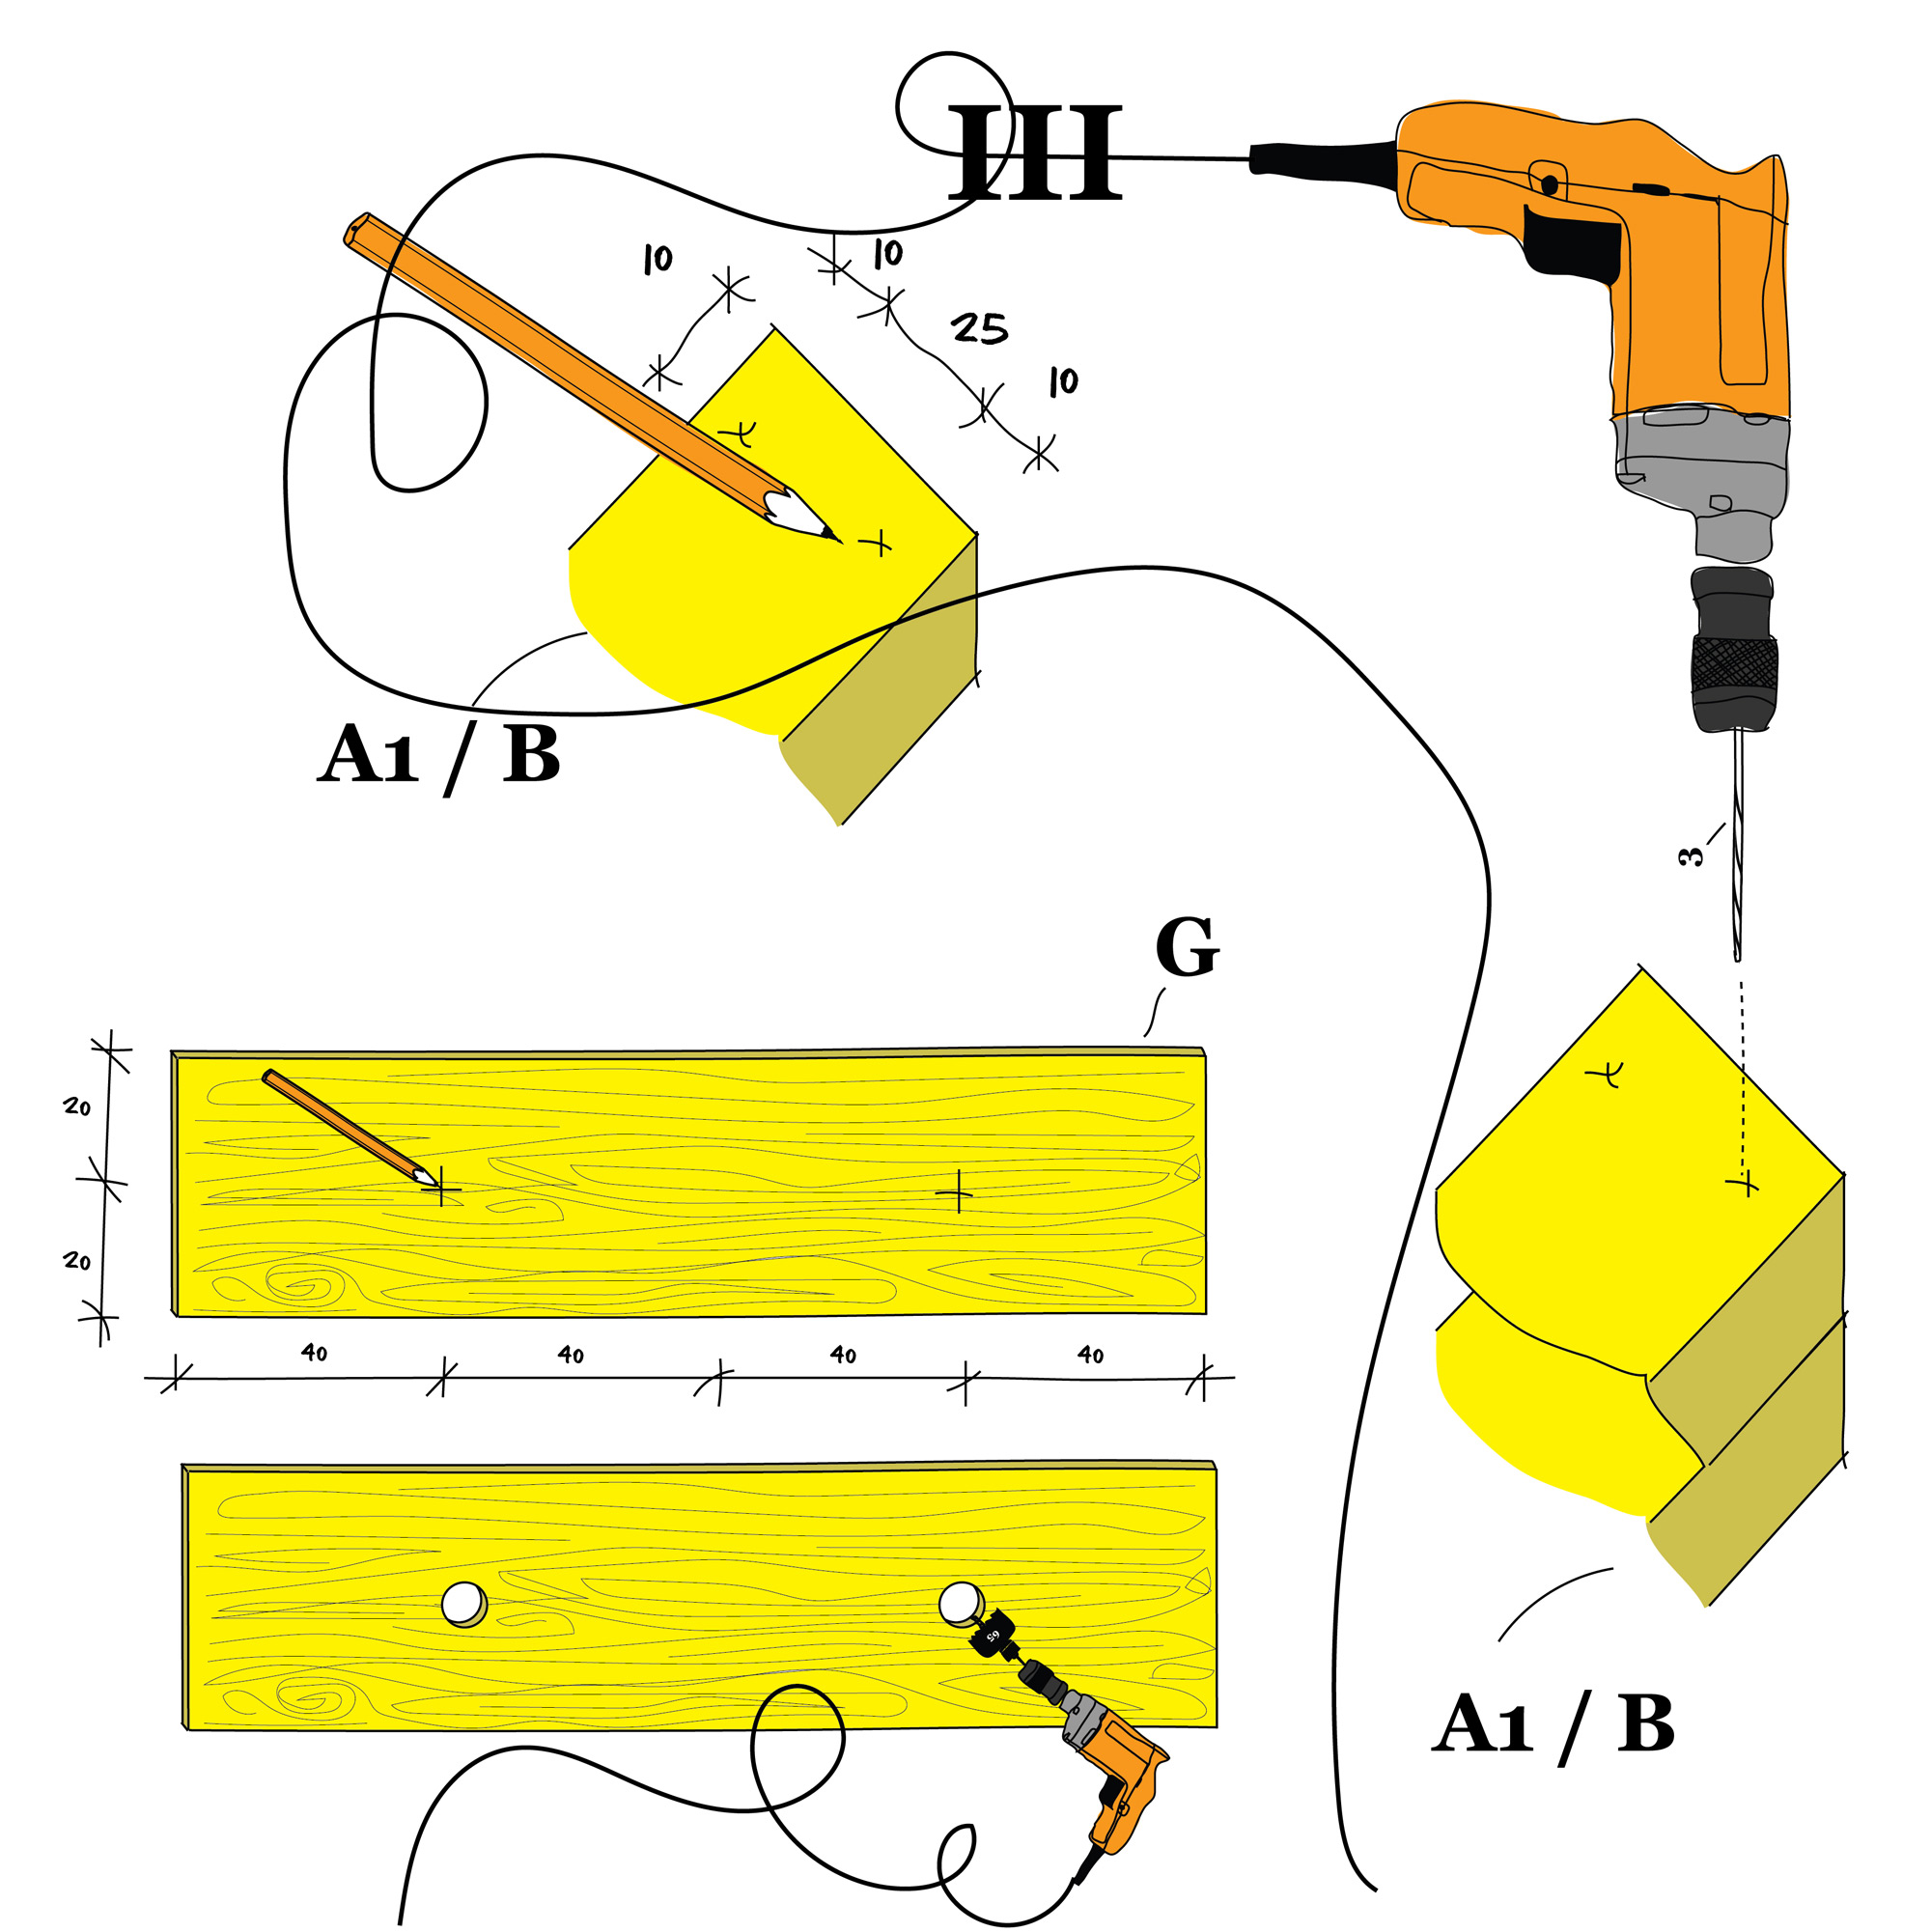
Mark with the pencil (I) the measures shown on each end of profiles of type A1/B. Use the 3 mm wood drill tip (L) to drill the holes according to the measuring marks. Use the first drilled profile as an example to drill following drills. We suggest placing a scrap under the profiles while drilling to avoid damage to the underlying surface Mark the sizes also on boards G and make the holes with the ø65 mm (N) hole drill.
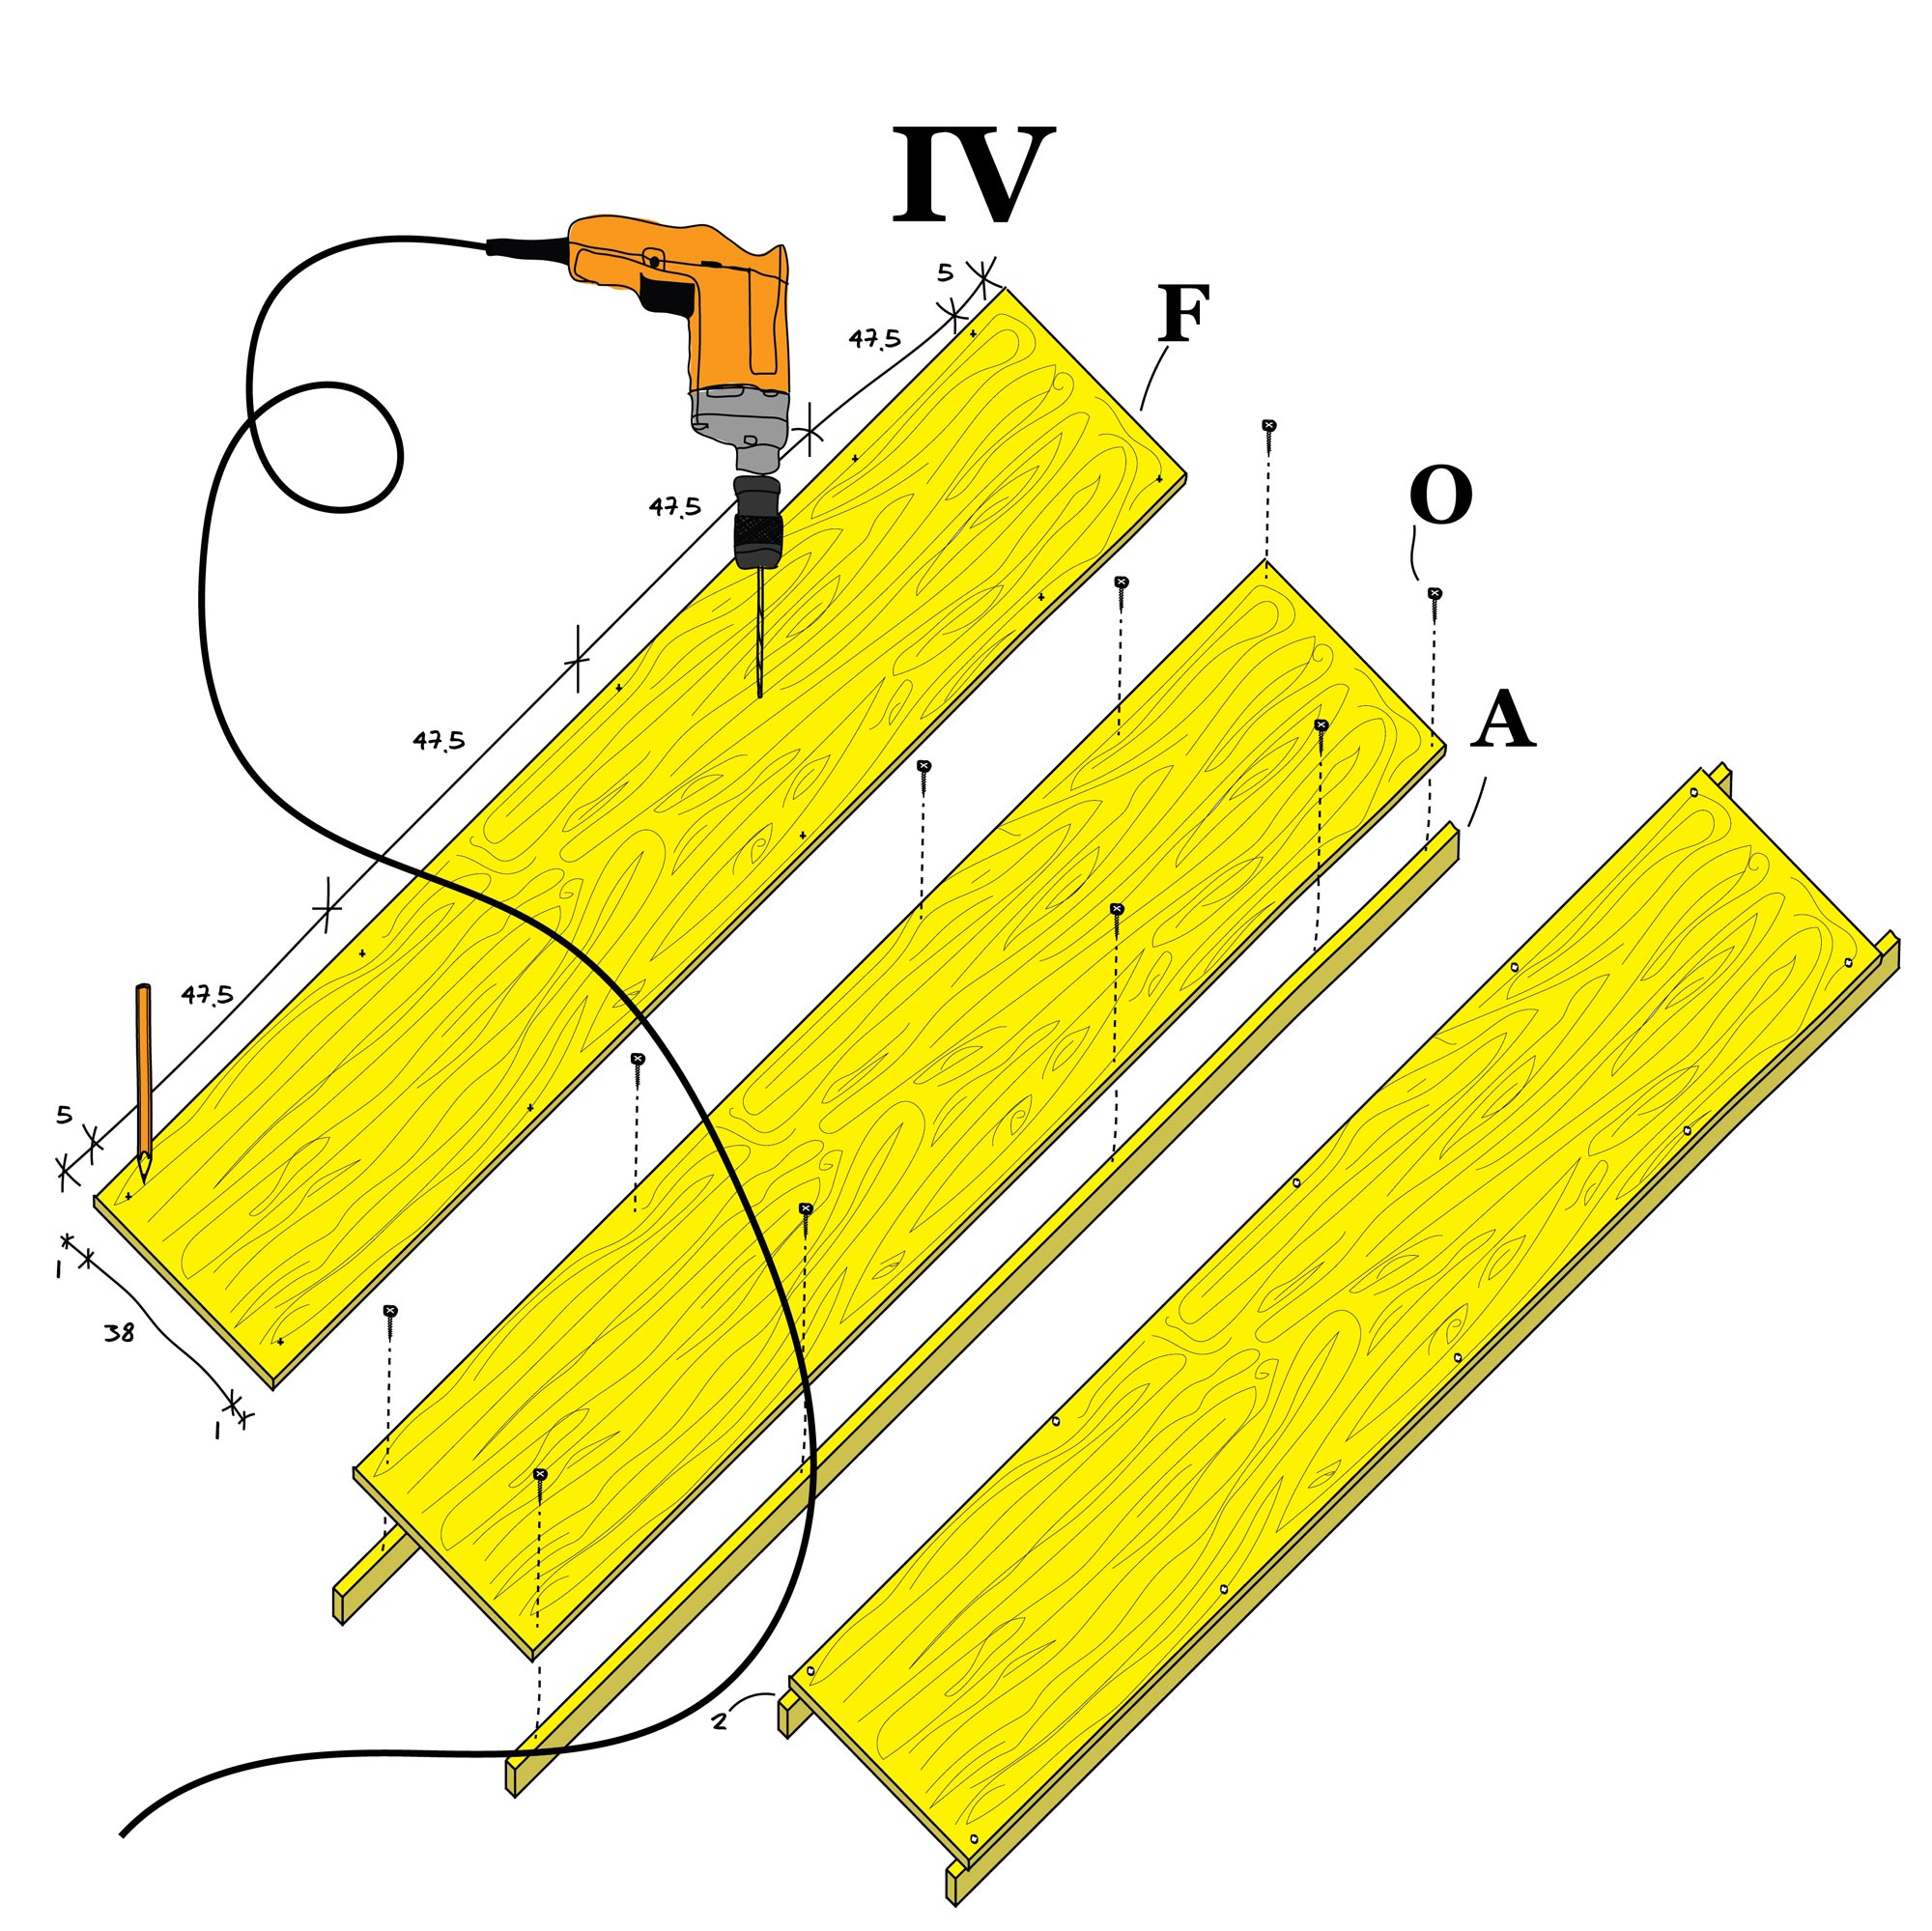
Mark with the pencil (I) the measures on the boards (F) and make holes with the 3 mm wood drill bit (L) Use the screws (O) to fasten the profiles (A) under the boards (F), by leaving 2 cm free space on both ends. Repeat the same step only on two of the available boards (F). Fasten one of the two profiles (F) on the remaining two boards. The other profile must be fixed first to the assembled structure (D).
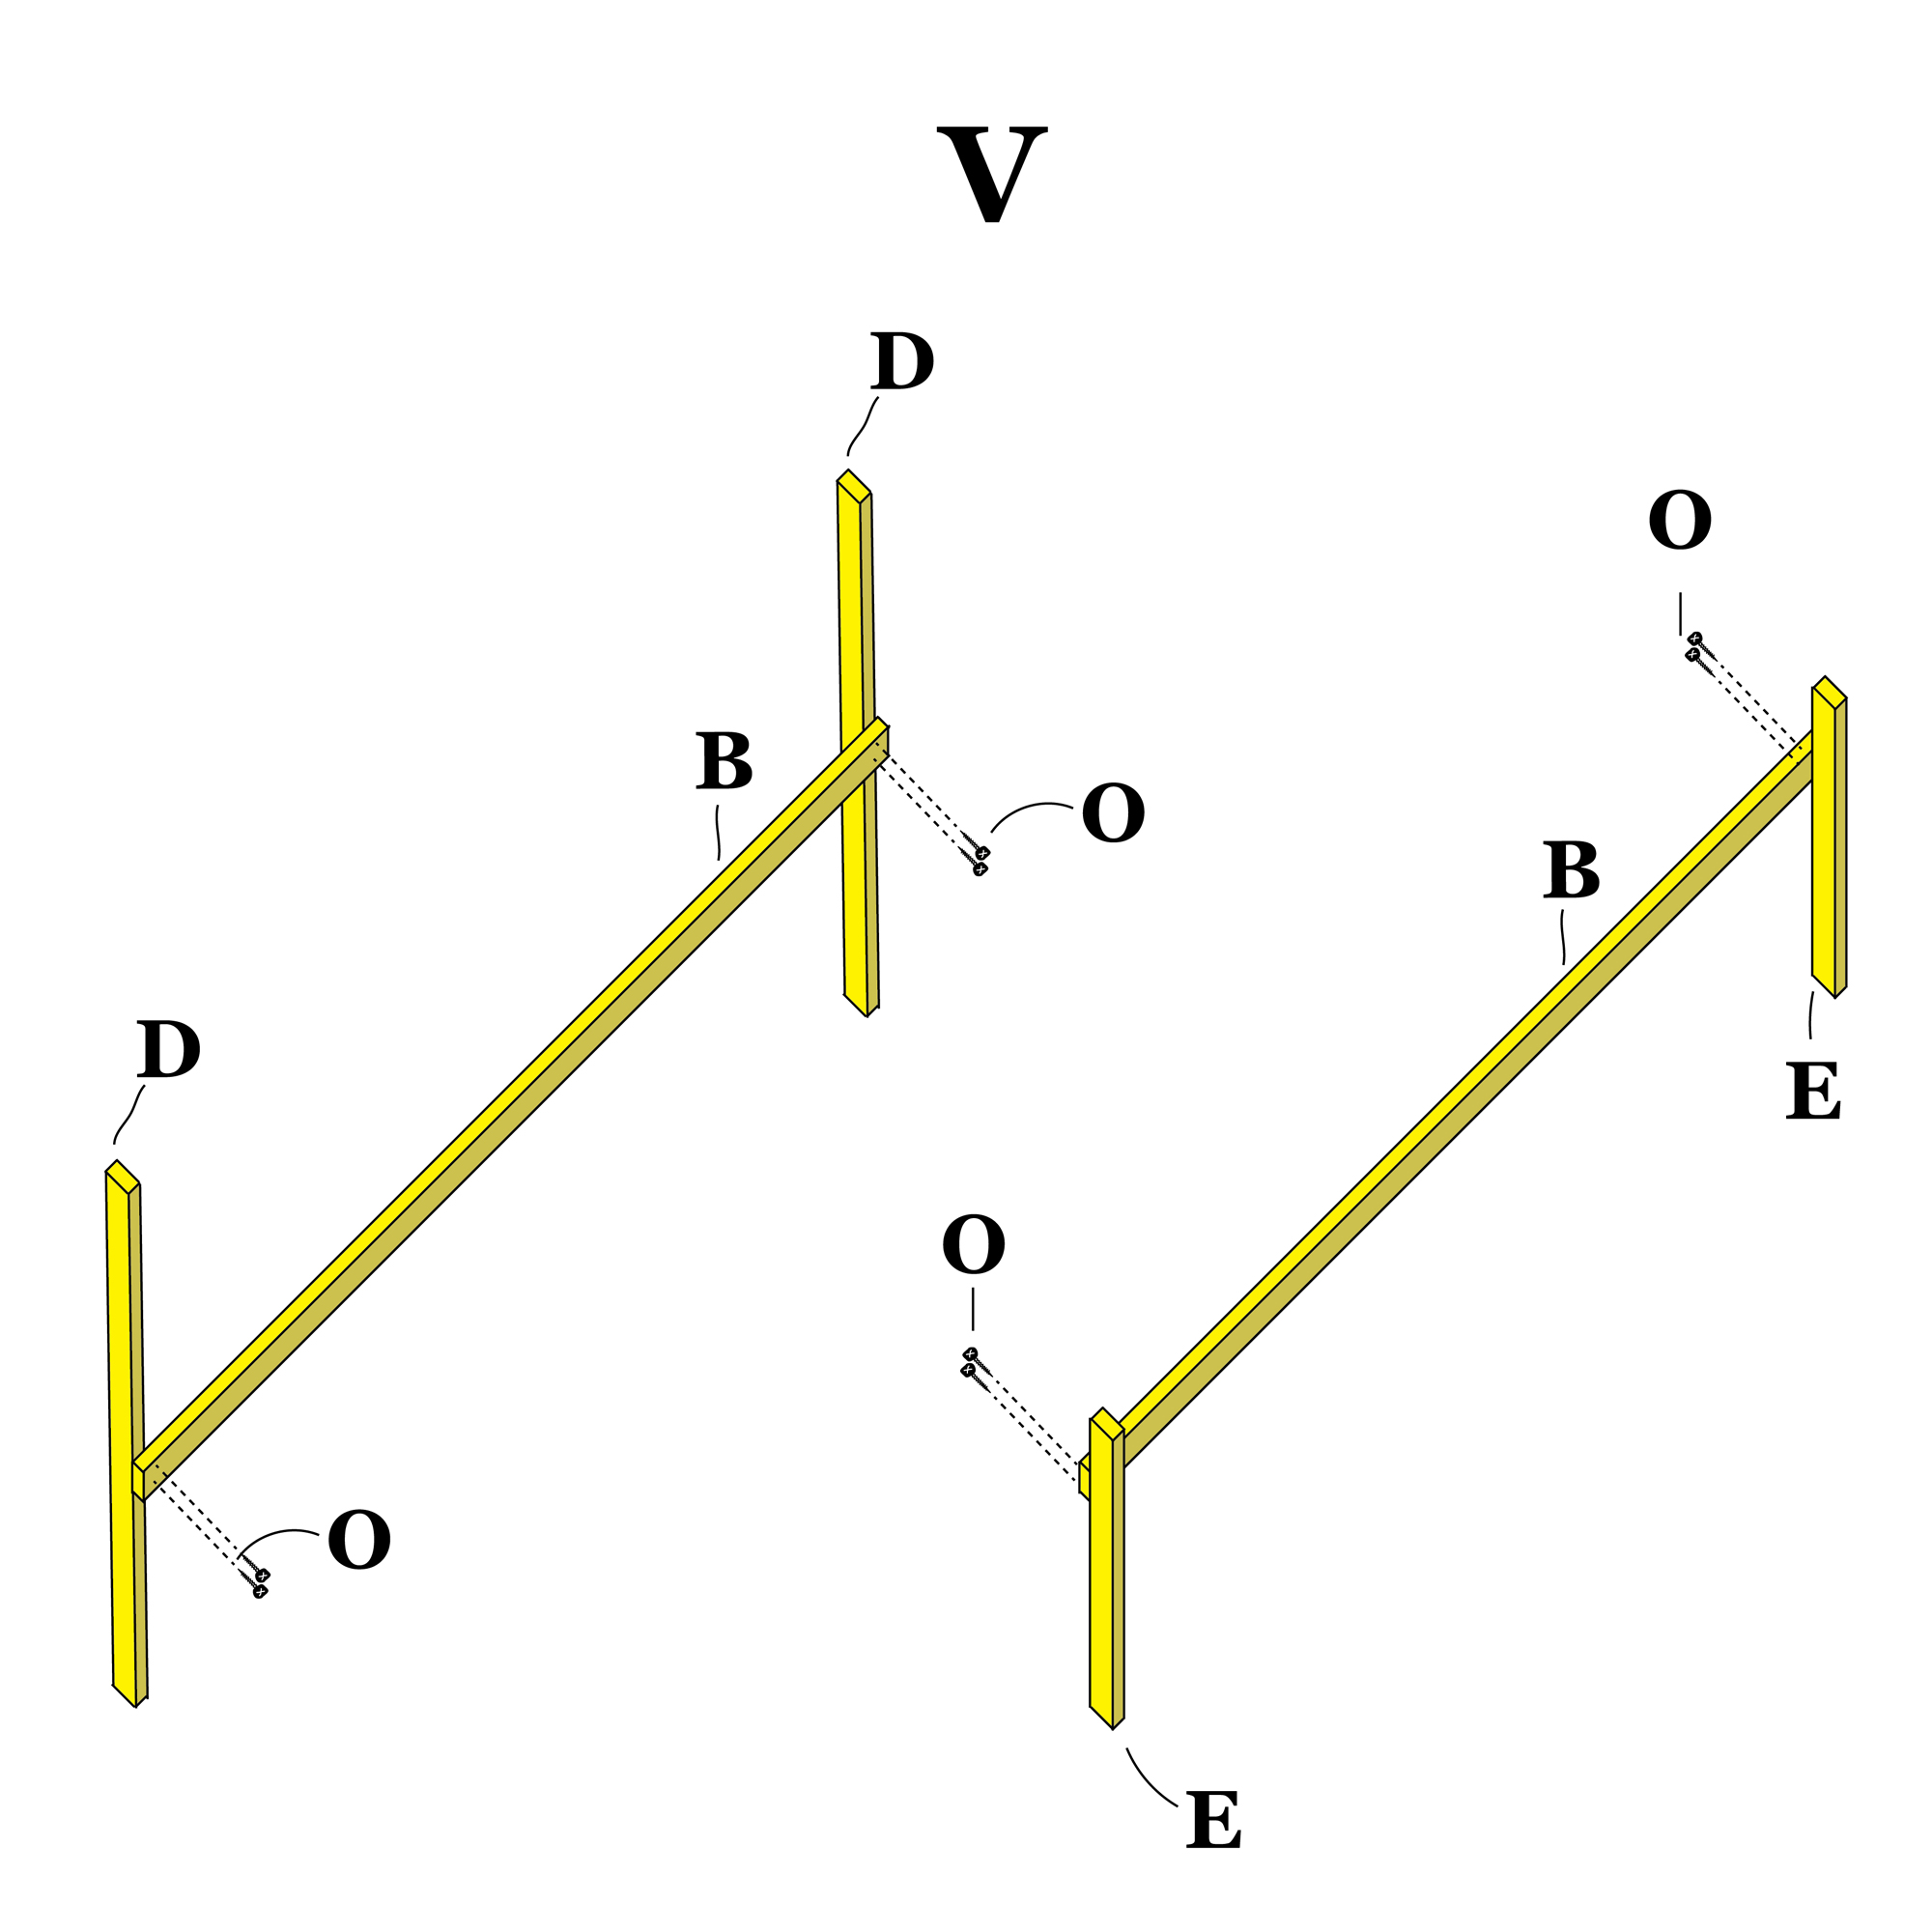
Fasten the crosspieces (B) to the uprights (D-E) with the screws (O).
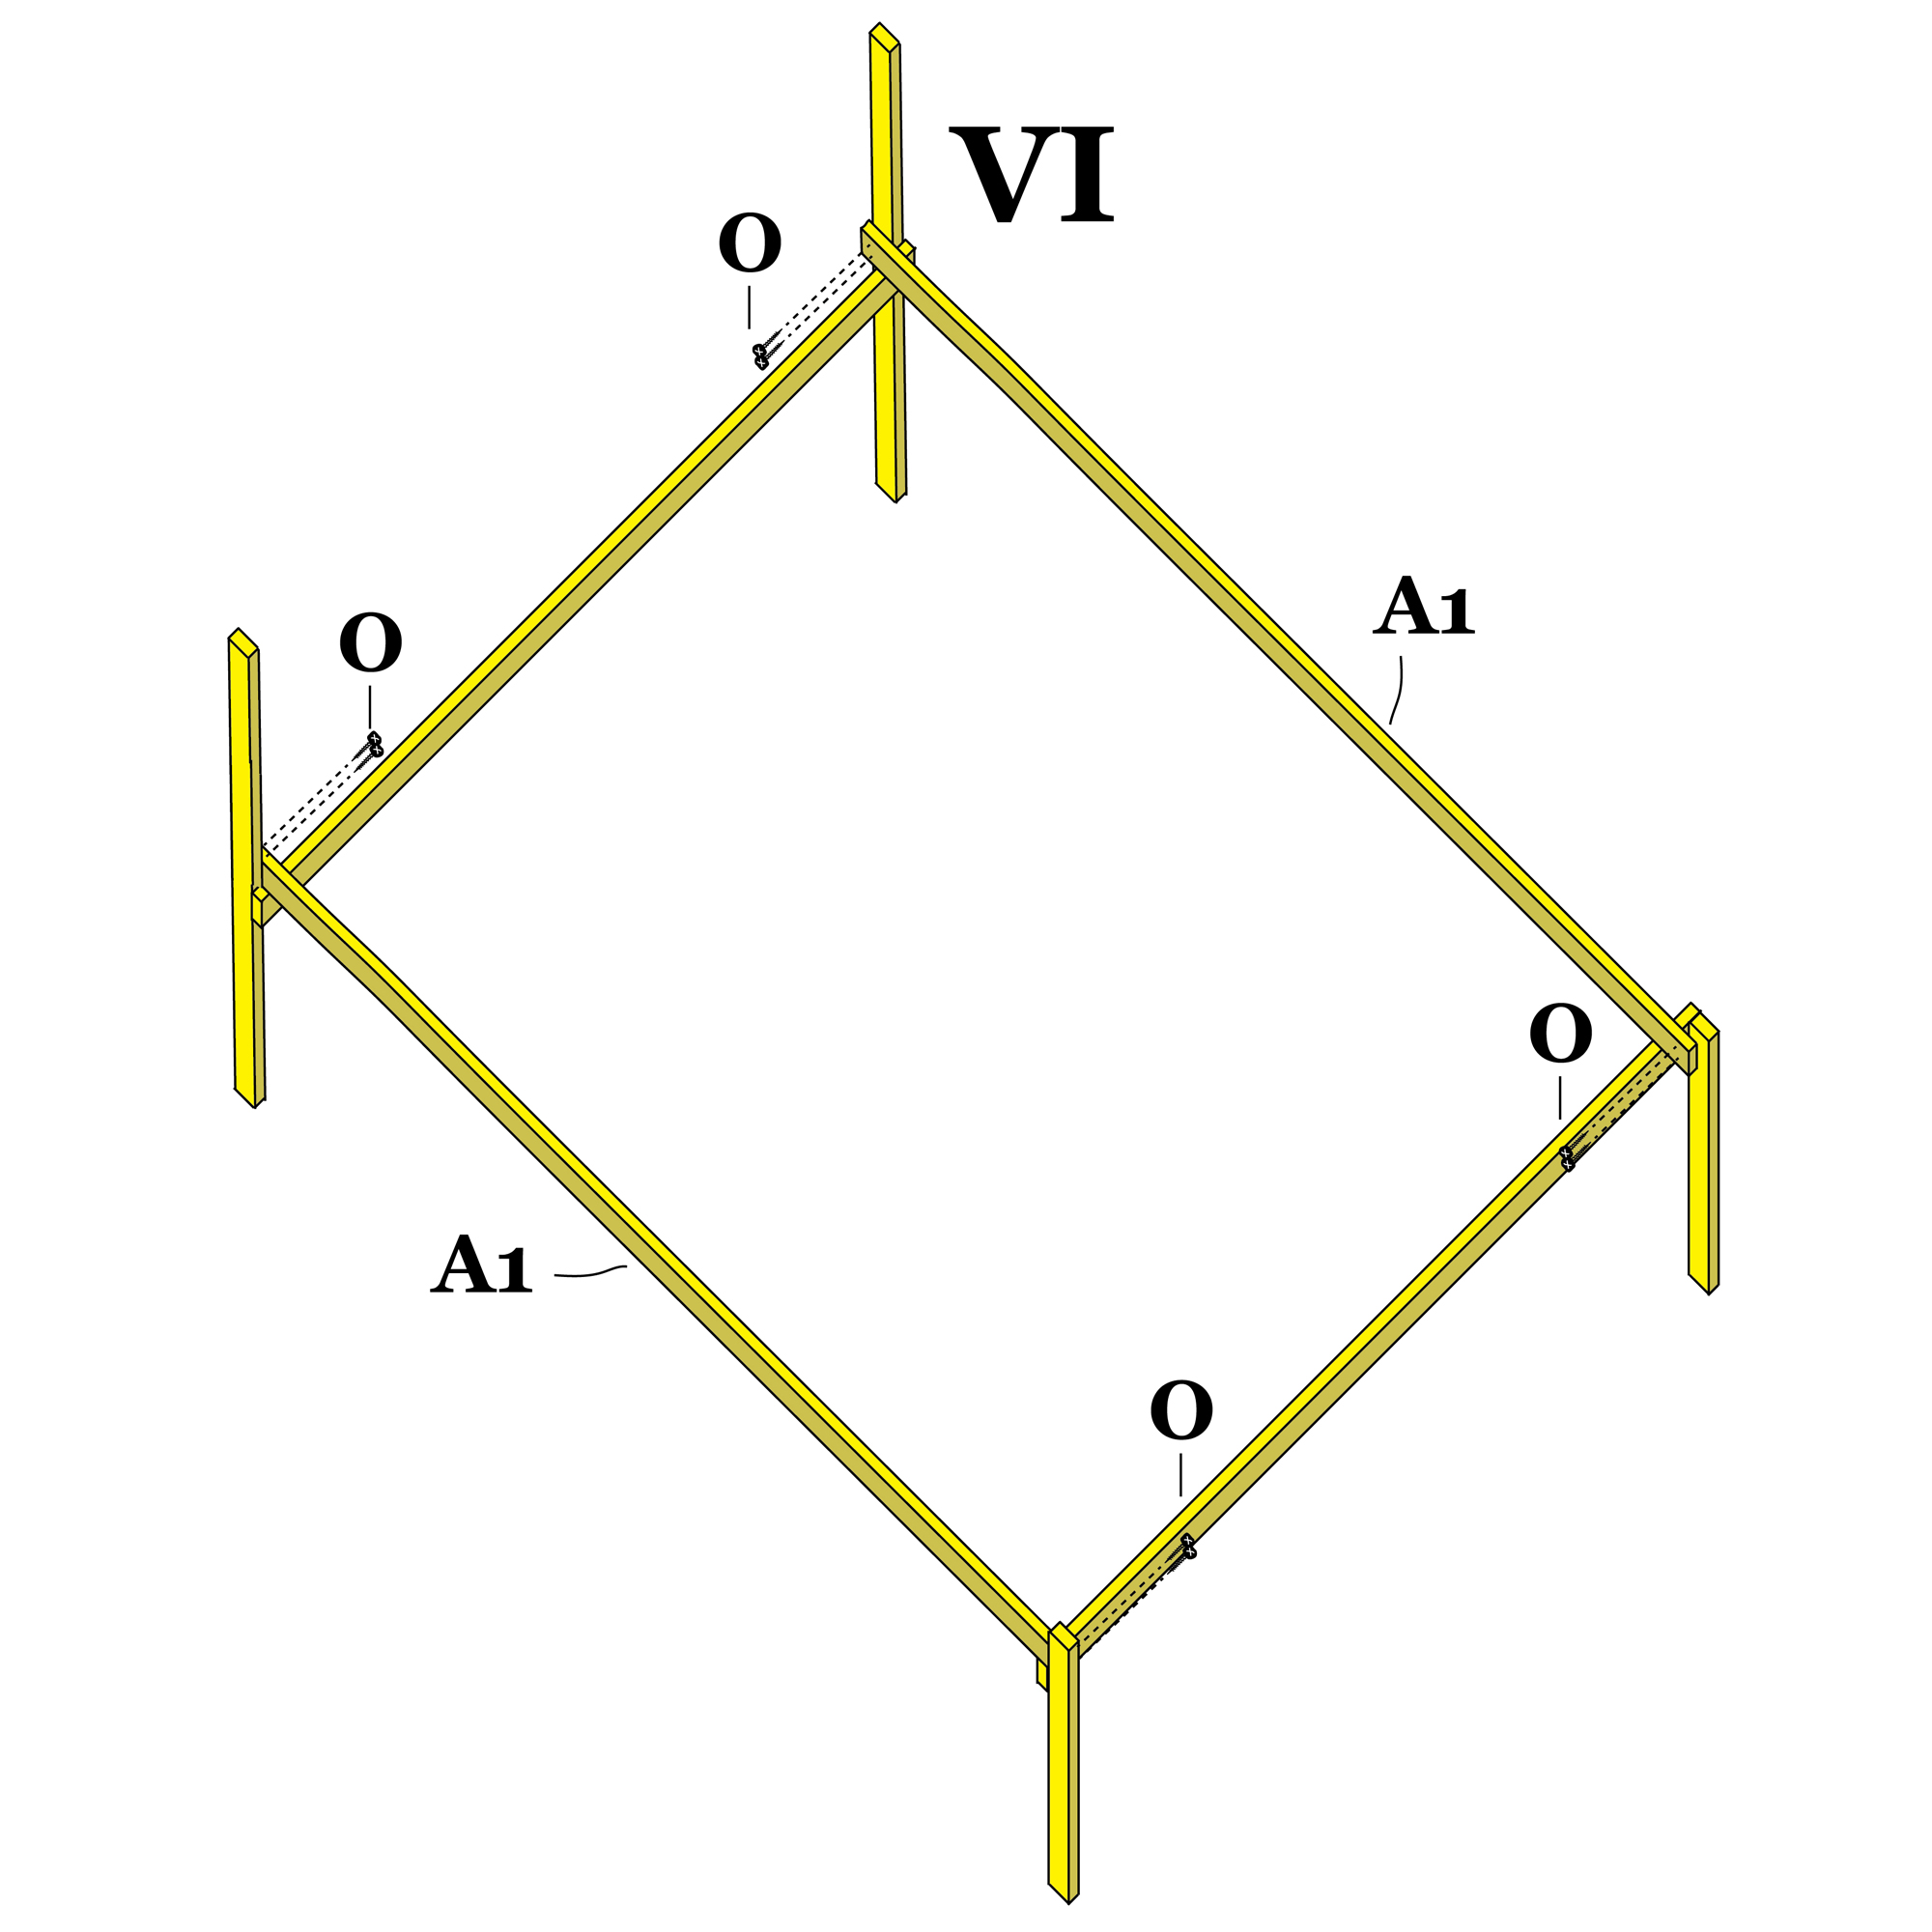
Fasten the two portals of the bed to the profiles (A) with the screws (O) on top of the previously assembled profiles (B). In this way the bed frame is done.
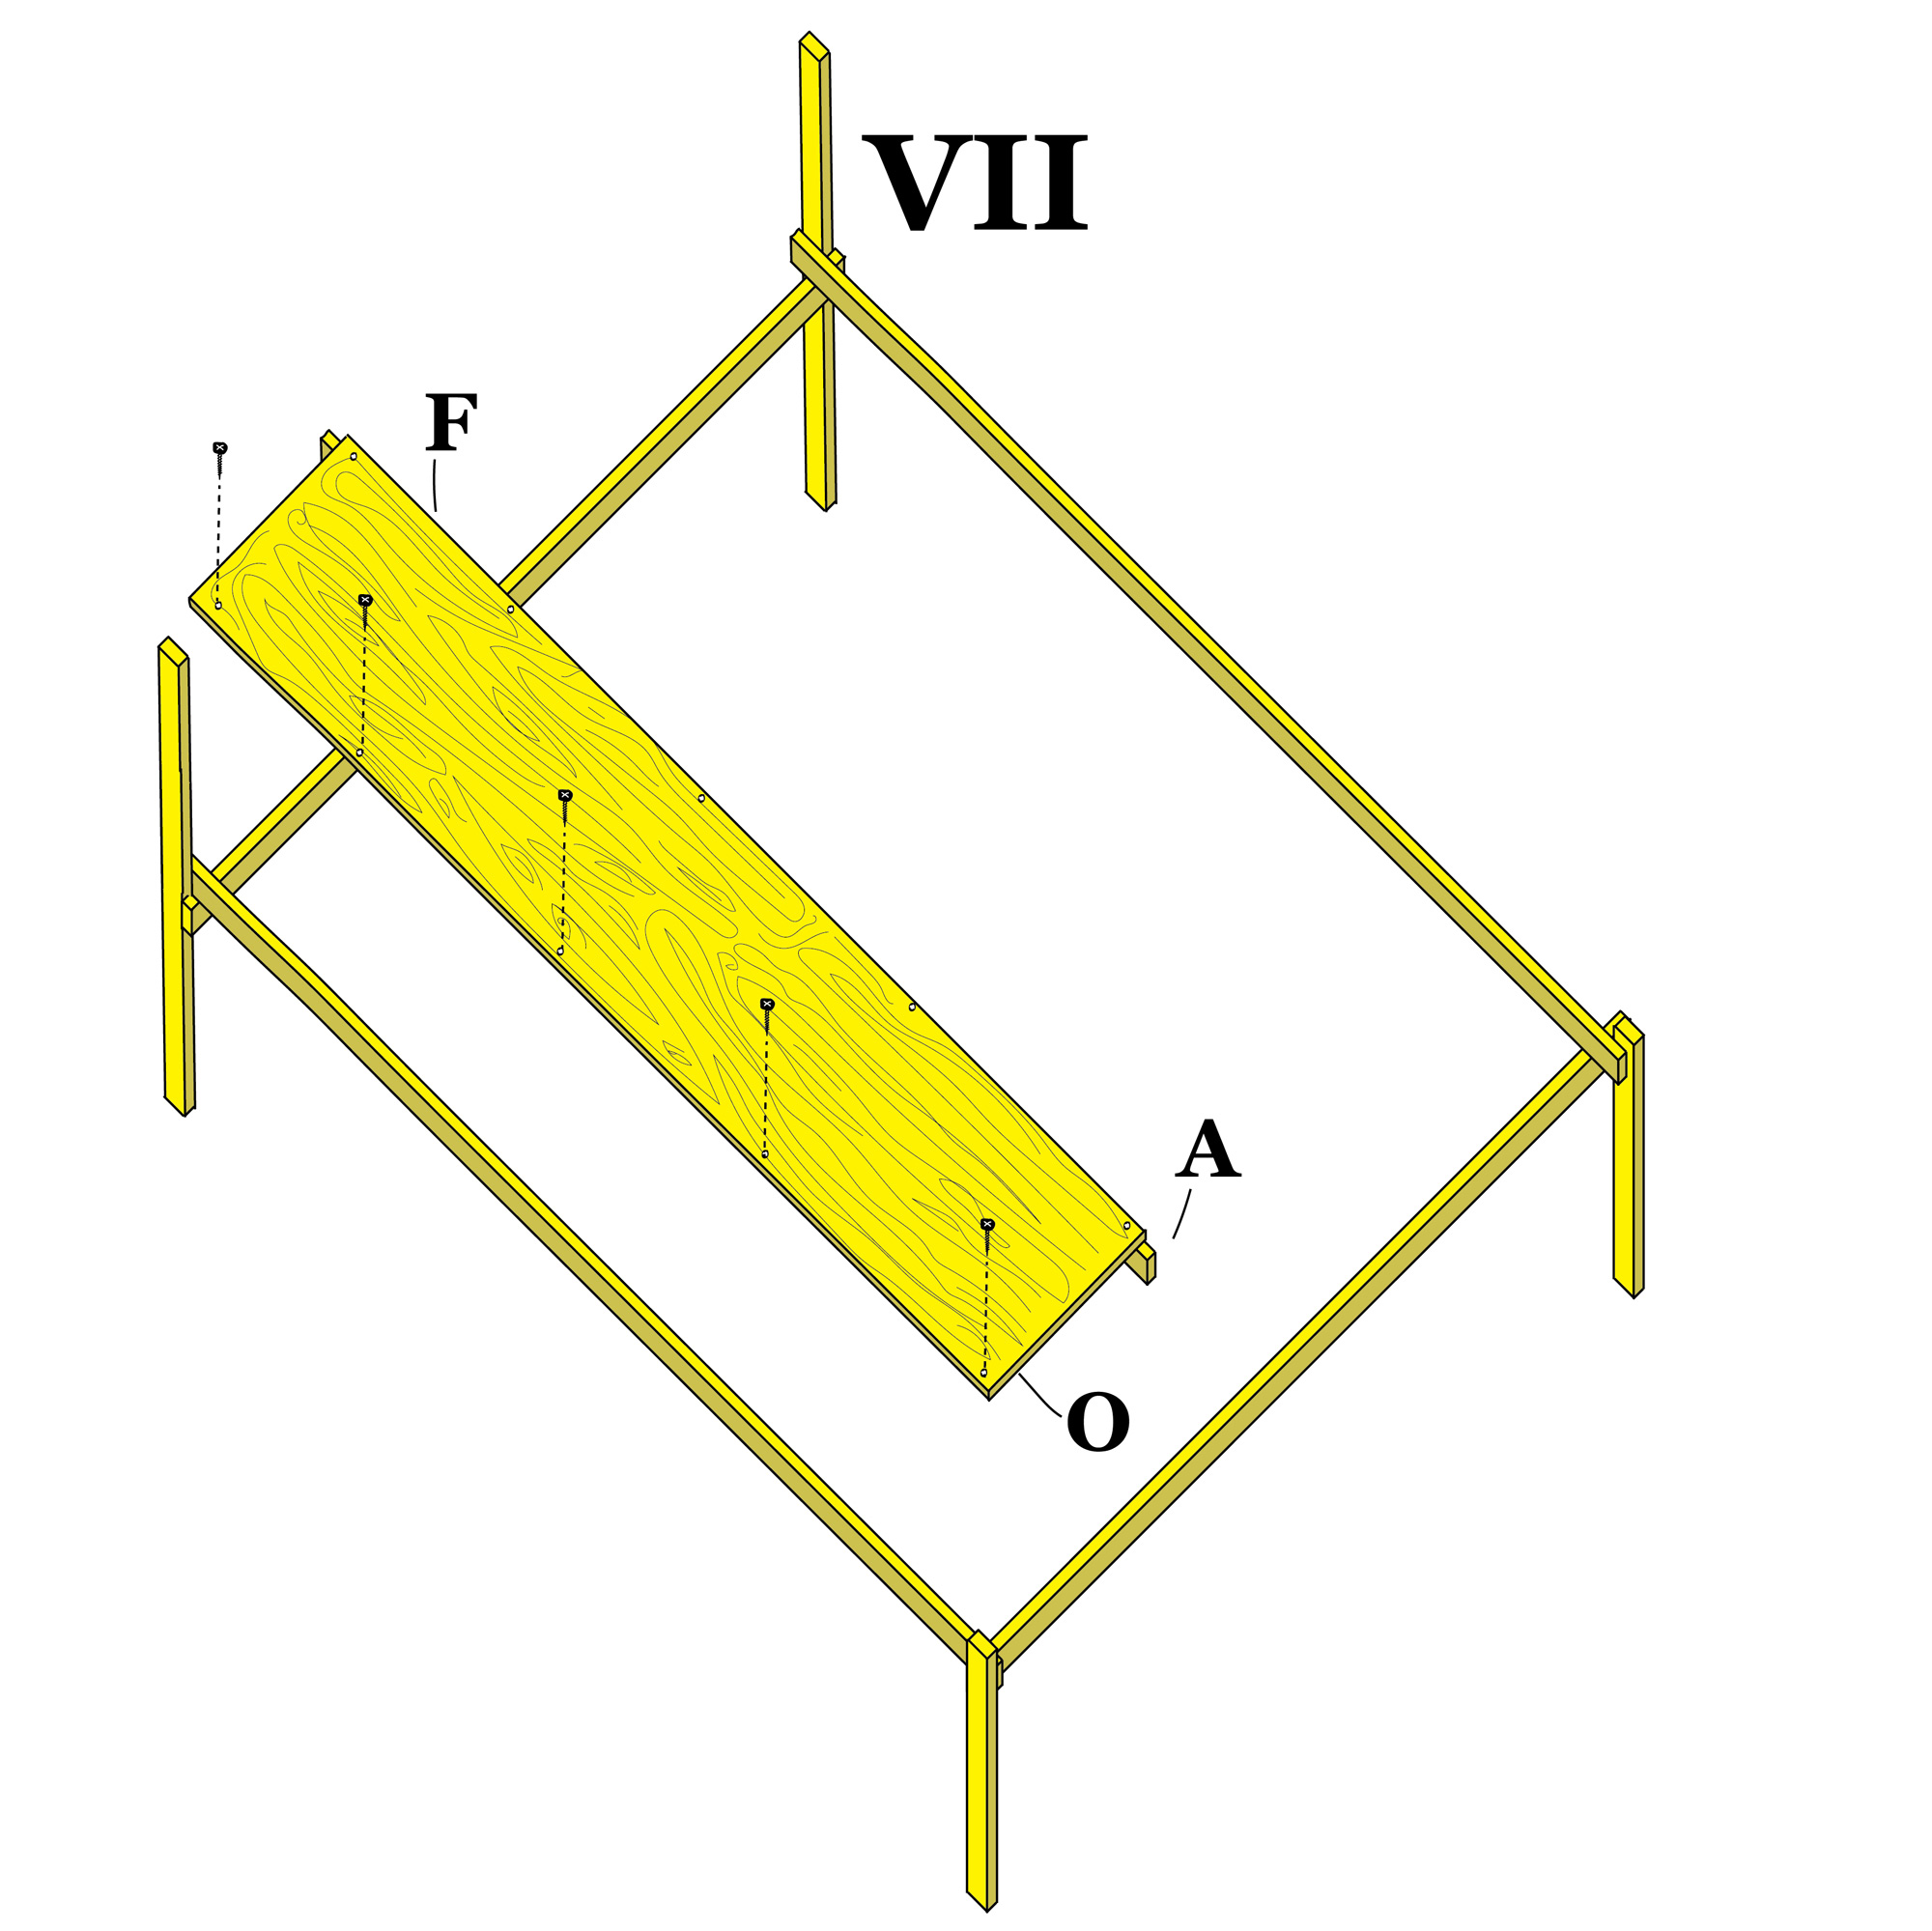
Fasten one of the two boards (F) to the crosspiece A1 in correspondence of the stiffening profile (A) previously mounted to the frame with the screws (O).
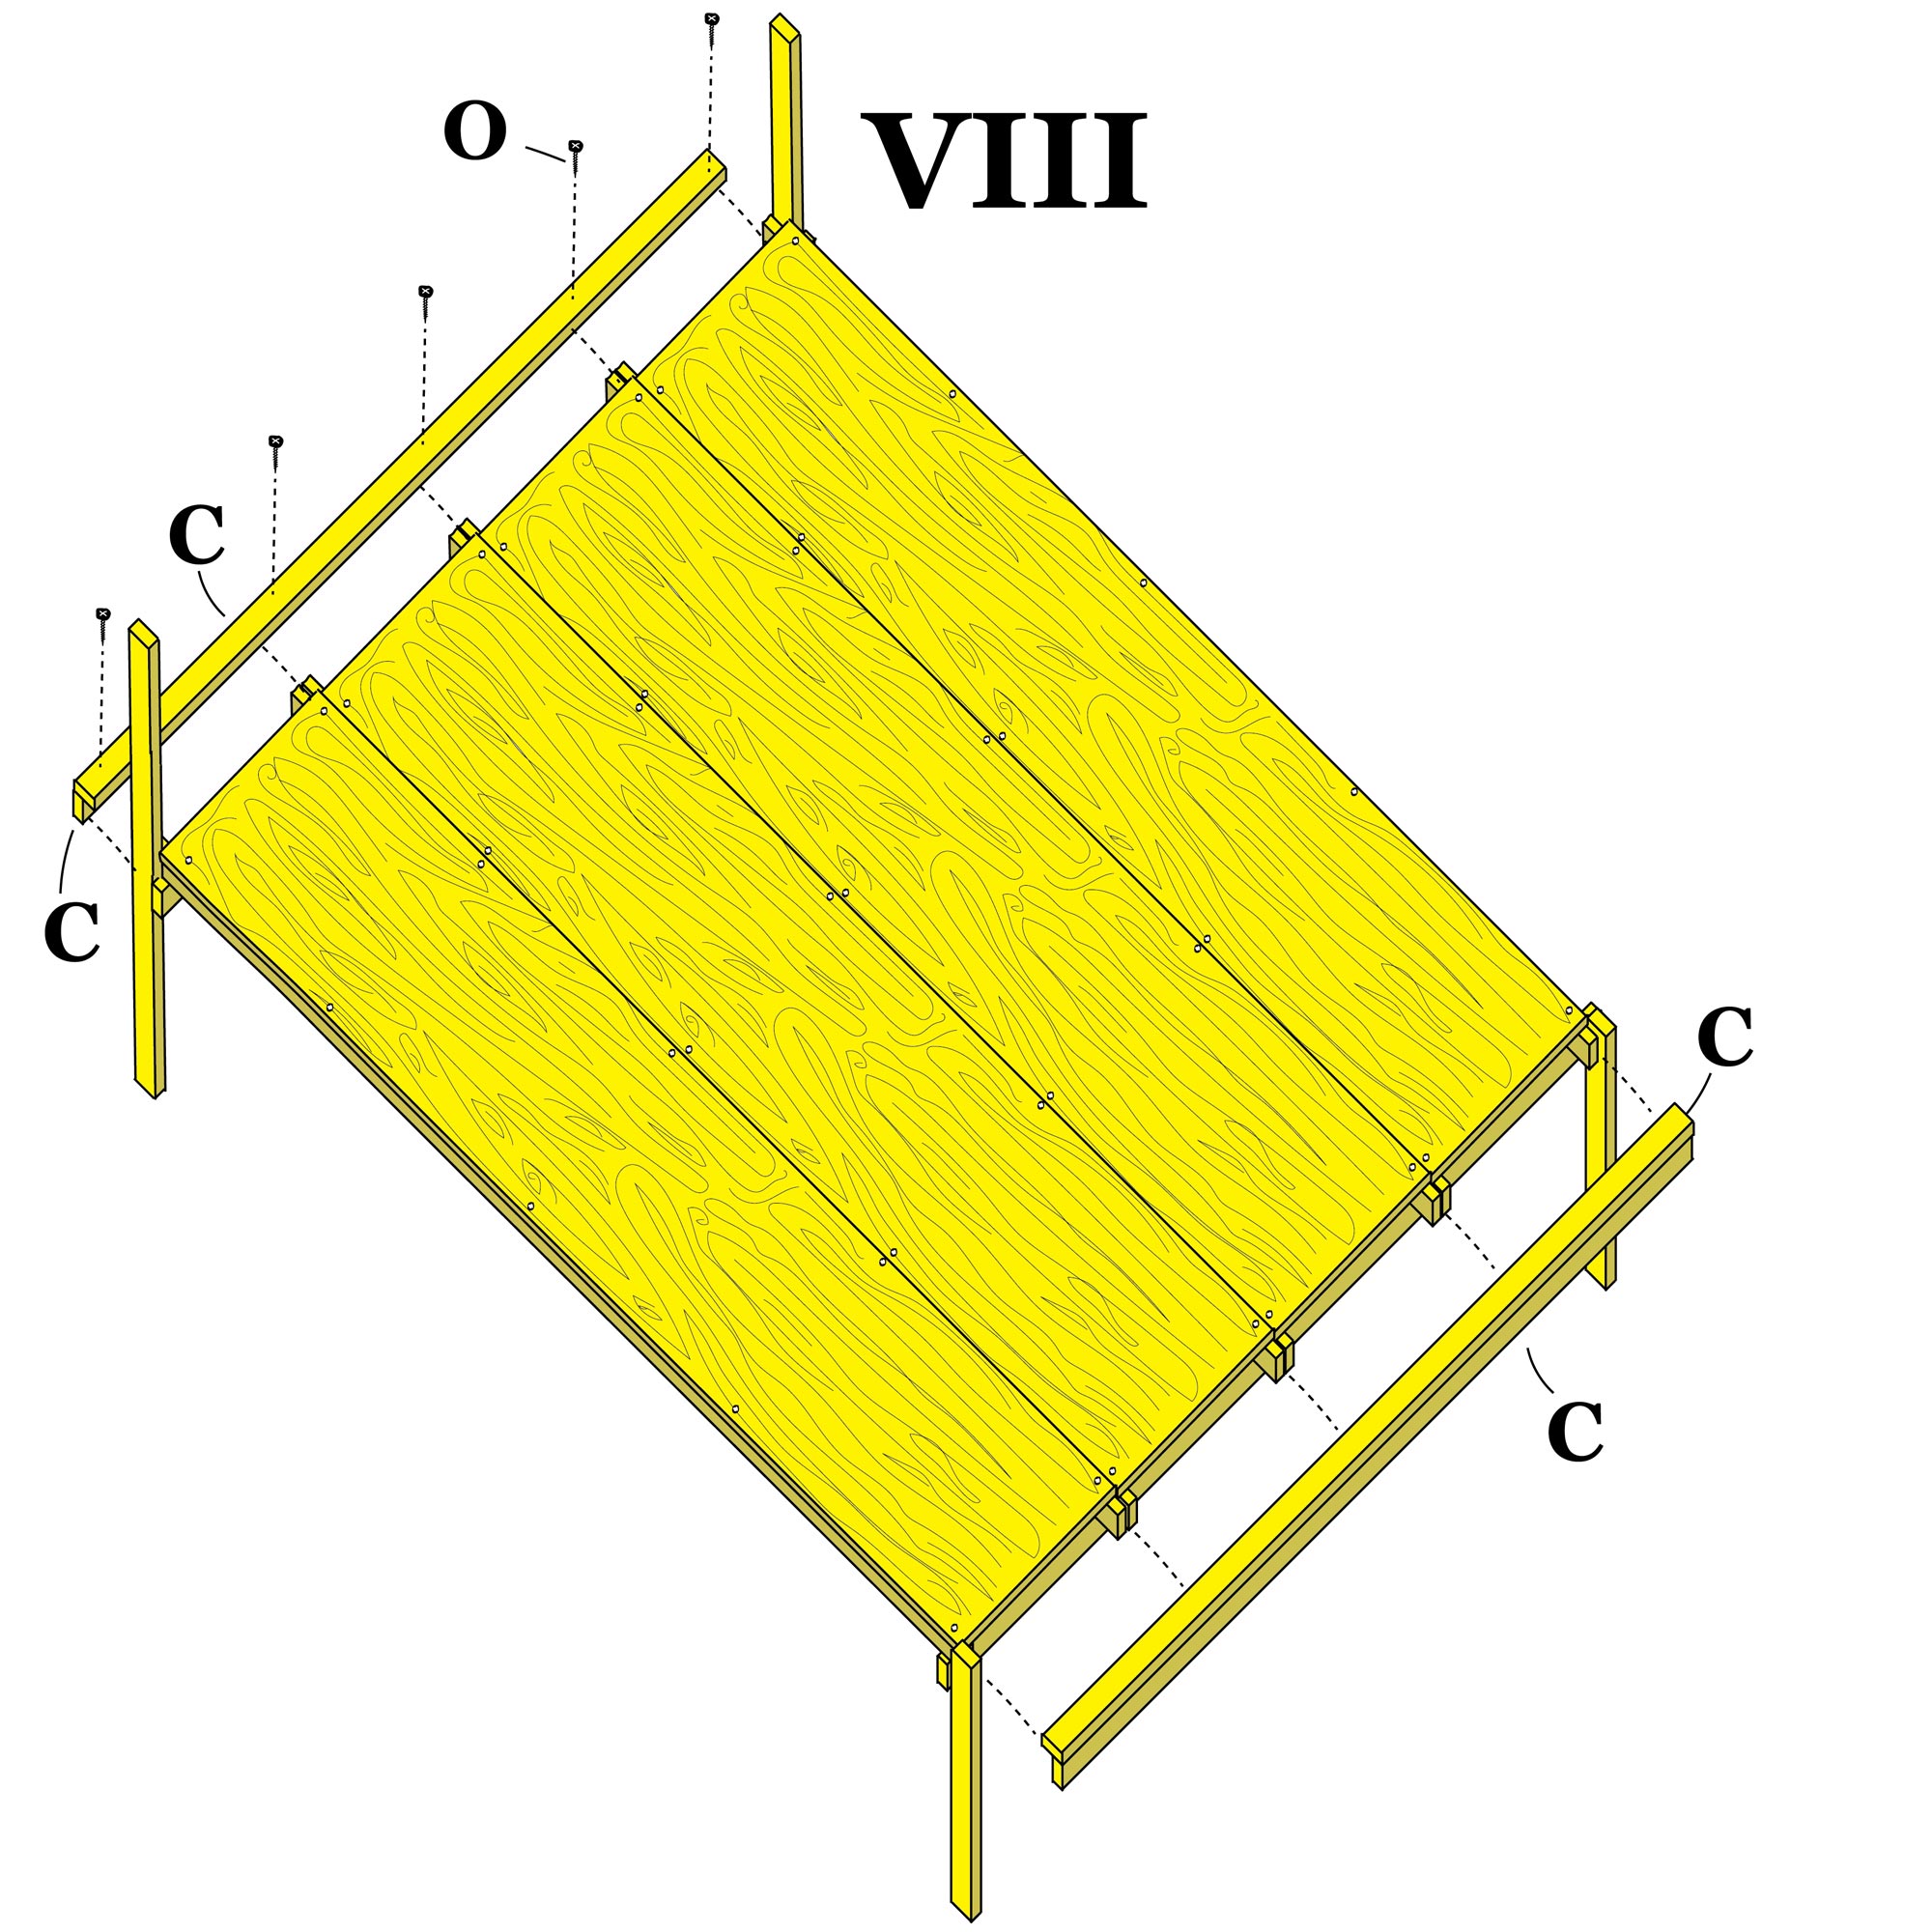
After fastening all other boards (F) to the frame and horizontally to each other, join profiles (A1) with the frame in correspondence of the uprights (D-E) and to each other on profile (A) with the screws (O). Make holes and fasten the profiles (C) to (L) with the screws (O). Assemble the new profile on top of the profiles (A1-A) previously fastened to the frame.
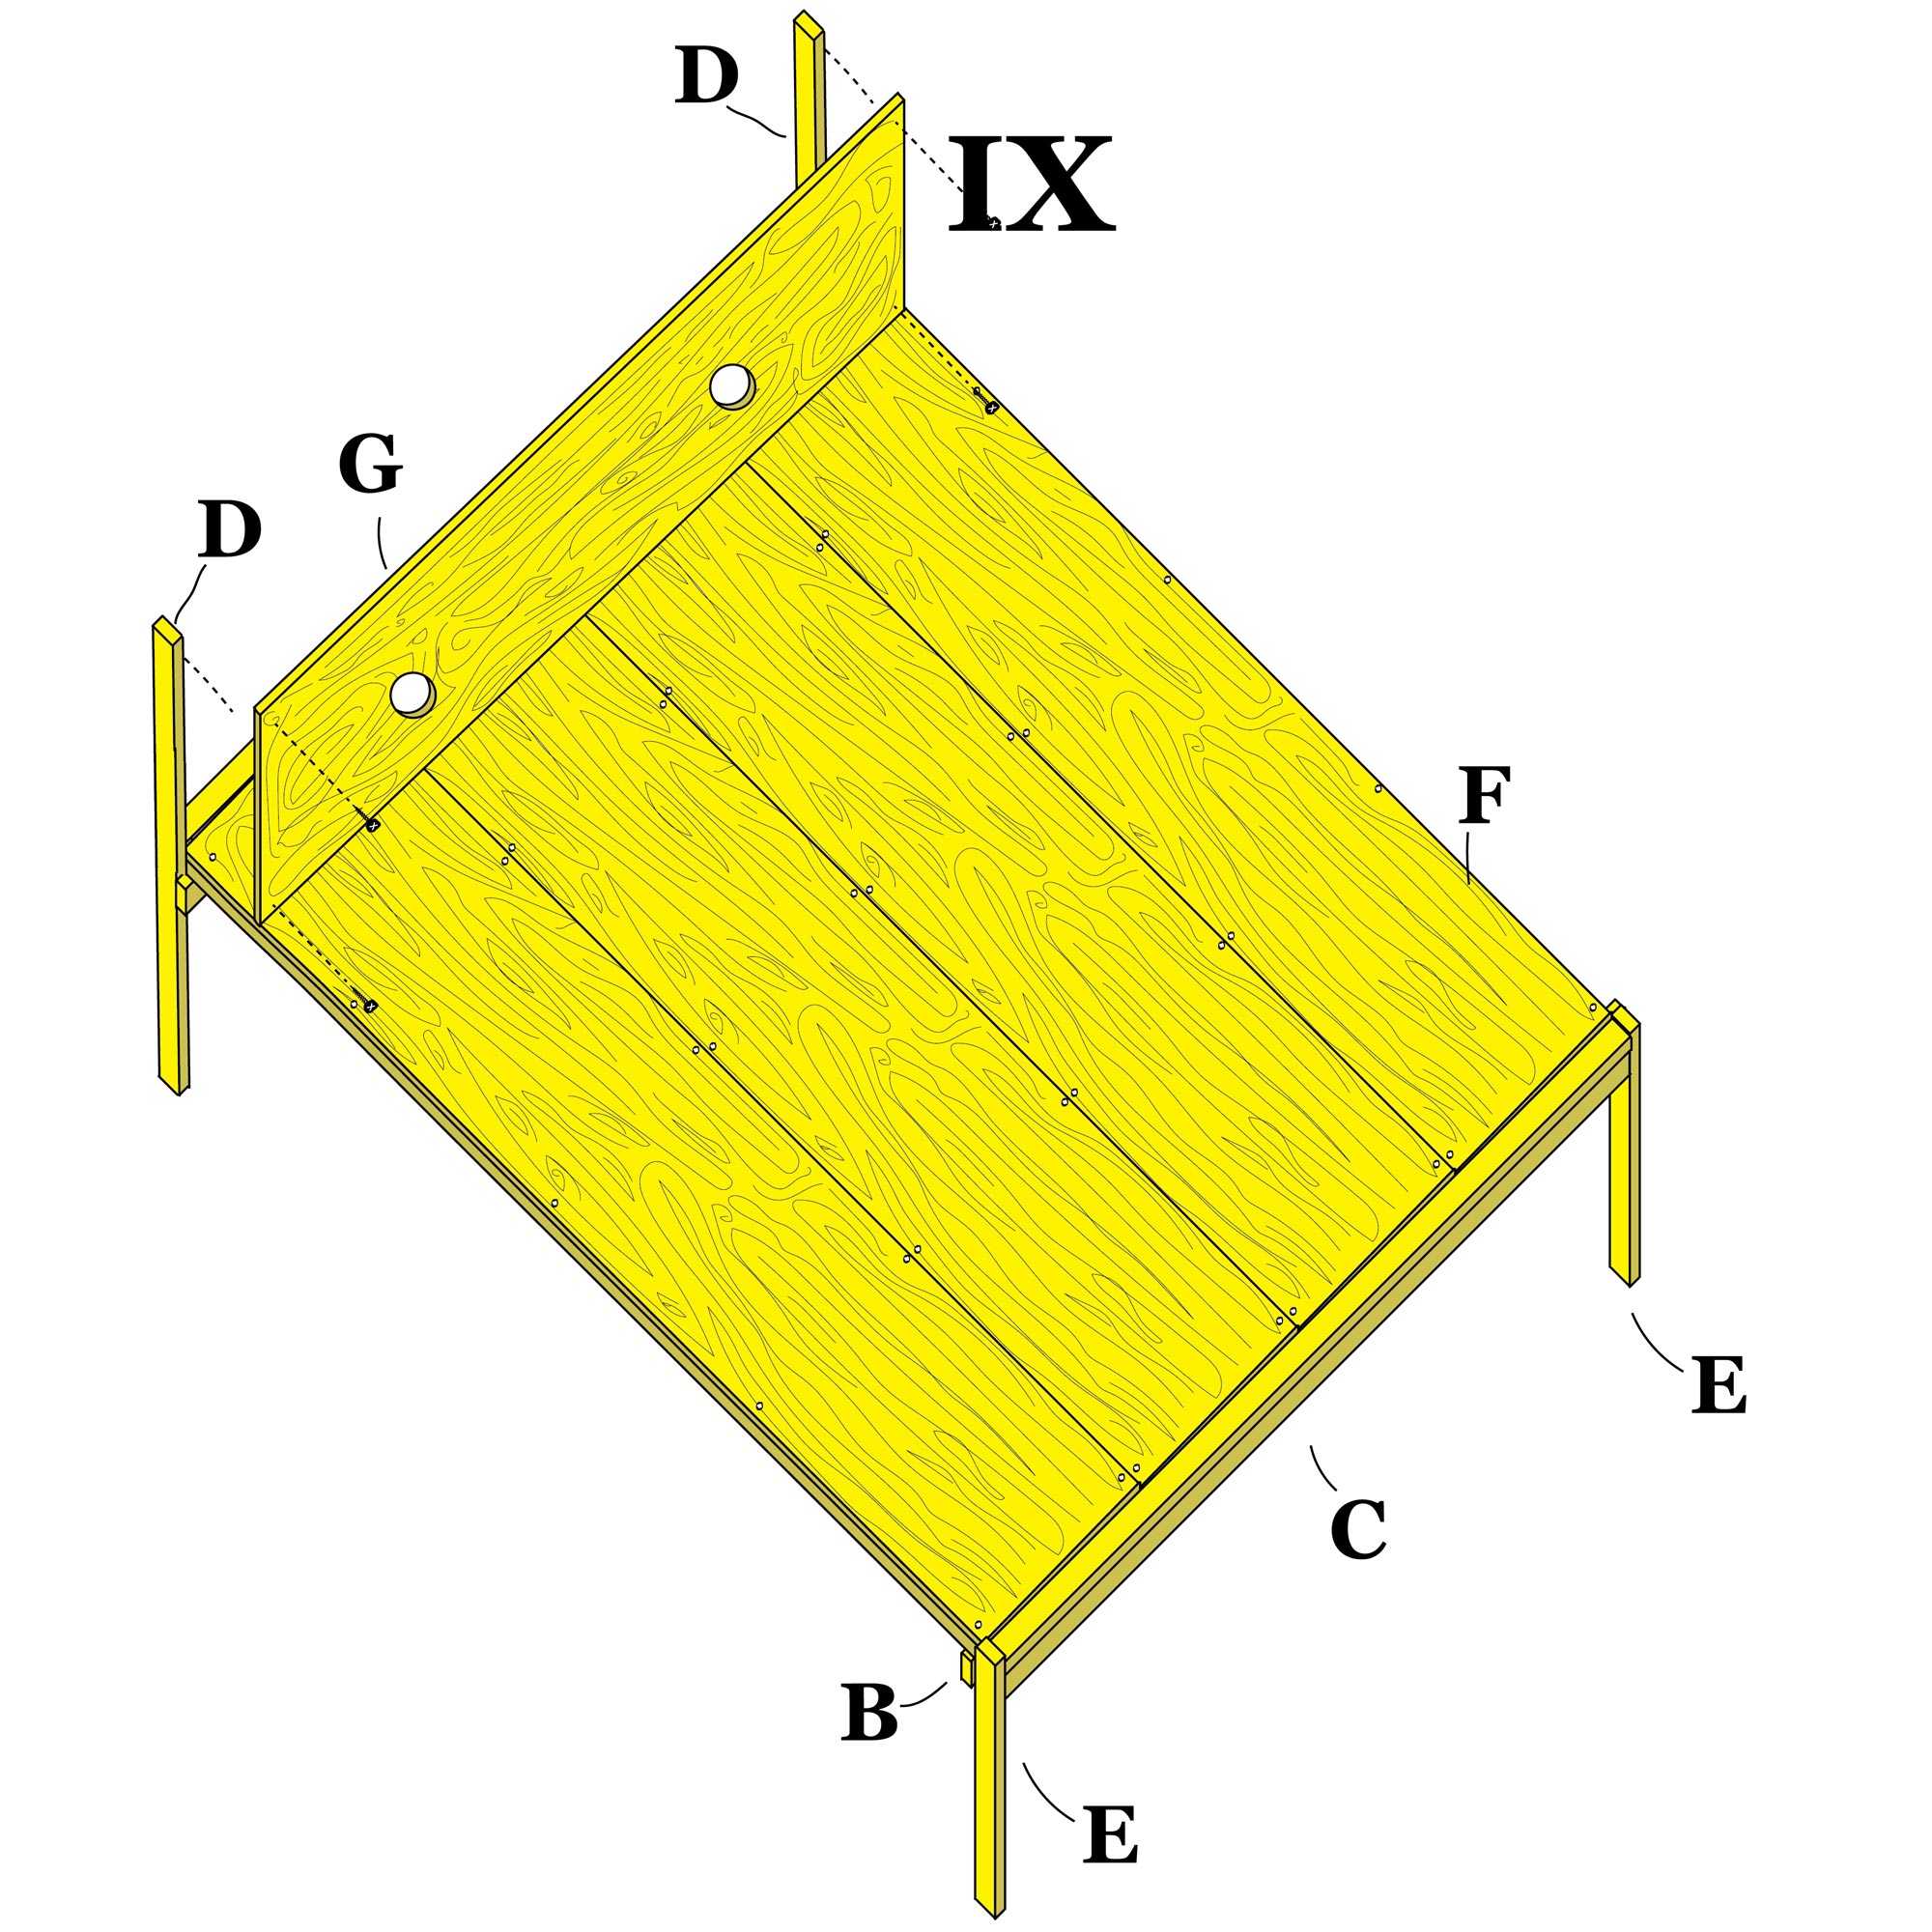
Fasten the board (G) to the uprights (D) with the screws (O). The bed is made and almost ready to welcome you and celebrate your life.
Illustration: Antonio Scarponi